Home maintenance can seem like a daunting task to many homeowners. Fear that your attempts at fixing a leaky faucet or drafty window will cause further damage can be discouraging. What’s the alternative? Hiring a pricey professional contractor, or ignoring small problems until they get bigger and more expensive to fix.
Fear not! Having a home maintenance plan can make a huge difference in your bank account and in the operation of your home. Also, performing proper home maintenance doesn’t require a lot of technical training or knowledge, nor does it require a lot of time or money.
Are you ready to roll up your sleeves and tackle a few home maintenance repairs around your home?
Simple Home Maintenance Tips
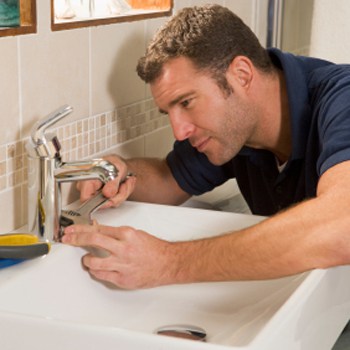
1. Faucets
2. Toilets
Water leaking from your toilet tank will not only drive up your utility bill, but it can also cause premature wear of your toilet’s internal workings and water damage to your bathroom floor. To find out if your toilet tank is leaking, add some bright food coloring to the water in the tank. Check the toilet bowl water in about an hour. If it has a tinge of color, you have a leak.
If your toilet is leaking from the tank to the bowl, the flapper most likely needs to be replaced. To change your toilet’s flapper, first shut off the water supply to your toilet. To do this, simply turn the water valve located directly behind the toilet clockwise. Remove the tank lid and flush the toilet in order to empty the tank. Use a towel or sponge to mop out any excess water left in the tank. Remove the flush chain from the lever, and then slide the old flapper up off the overflow tube. Slide the new flapper in place over the overflow tube, reconnect the chain, and turn the water supply back on.
3. Washing Machine & Dryer
Faulty washing machine drain hoses are as important as water supply lines when it comes to preventing water damage. As with supply lines, regularly inspect the ends of your washing machine drain lines for discoloration or rust, and replace them immediately if you find evidence of leaking.
Additionally, make certain drain lines are tightened properly by using a crescent wrench or a pair of pliers. You should not be able to tighten the line any further if the line is properly tightened. Plastic lines should be replaced every three years.
When it comes to your dryer, regularly cleaning your lint screen is an important step in preventing fires. In addition, a clean lint screen will increase the life of the heating element. Physically remove the lint from the screen between each load of laundry. Also, be sure to remove fabric softener residue by washing the screen with warm water and dish detergent at least once a month.
4. Water Heater
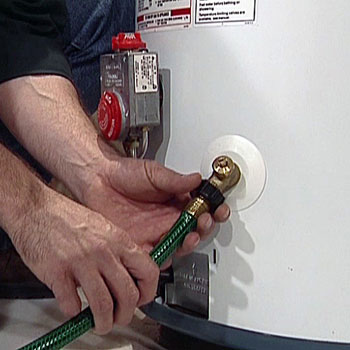
Water has sediment suspended in it. When water sits in your water heater, these particles often settle to the bottom of the tank, causing damage to the floor of your water heater. About once a year, drain the water from your water heater and clean the inside surface of its floor.
To drain your water heater, first turn off the water supply and power to the water heater. For electric water heaters, turning off the power means locating the circuit breaker and flipping it to the “off” position. For gas water heaters, turn the thermostat setting to the pilot position.
Next, connect a water hose to the drain fitting at the bottom of the tank and put the other end in a place, such as your driveway, where the draining hot water won’t cause any damage. A typical garden hose is a direct fit to the drain fitting. Turn on all the hot water faucets in your home and then open the drain valve on the water heater. Turn the water supply back on with the drain valve still open to remove any built up sediment in the bottom of the tank. Then close the drain valve, refill the tank, and turn the power back on.
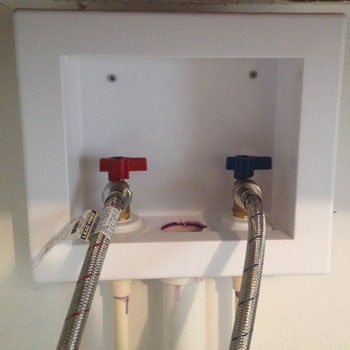
5. Plumbing
In order to keep water flowing freely through your pipes, keep the following things in mind:
• Fat and oil buildup are the most common cause for drain clogs, so never pour fats or other oils down your drains. This includes oils that are not solid at room temperature. If you accidentally spill oils or fats down the drain, run hot water down your drain along with a good amount of dishwashing liquid. The soap will emulsify the fat or oil and move it on down the pipe, preventing a clog.
• Get a hair strainer for the bathtub drain. If fats and oils are the main source of drain clogs in the kitchen, hair is the most common culprit in the bathroom. If you have a strainer, make sure that you remove all the hair from it following each shower. This will cut down on the amount of hair that finds its way through the strainer and into your plumbing.
• Skip drain cleaning products. While the acids in those product can help unclog a drain, they can cause lots of damage to your plumbing, including premature leaking. This can lead to costly repairs later on. Instead, first try using a plunger. If the plunger doesn’t loosen the clog, you can use a small drain snake – which can be purchased at most hardware stores.
6. Air Conditioning
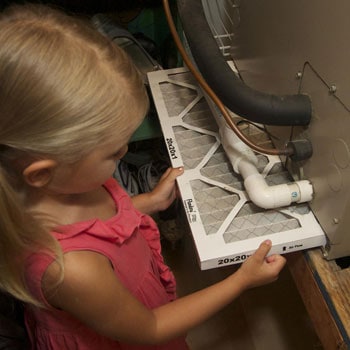
7. Air Filters
Change the air filter in your central air conditioning and heating unit often, especially during peak usage months. Read the instructions on your particular filter to determine how often it should be changed. As a rule of thumb, filters should be changed every 30 days.
Using cheaper fiberglass filters is said ti be preferred over the more expensive HEPA filters for two reasons: First, replacing the more expensive filters often isn’t cost-effective. Second, the fiberglass filters actually allow for more air to flow into your climate-controlled unit, thus reducing the energy needed to cool or heat your home.
8. Refrigerators
To test the door seals, close the door on a dollar bill and try to pull it out with the door closed. If bill is somewhat difficult to pull out from the door, your seals are in good shape. However, if the bill slides out without much resistance, it might be time to replace the seals. You can purchase new seals from most home repair stores.
Also, if your refrigerator has coils along the back, periodically vacuum the coils to remove dust and dirt build up. The refrigerator uses coolant running through these coils to keep the internal temperature cold. If the coils become dirty, they won’t work efficiently and your refrigerator may stop cooling altogether.
As a general tip, a full refrigerator uses less energy than one that is more empty. Therefore, keep as many items in your refrigerator as possible to help reduce energy costs.
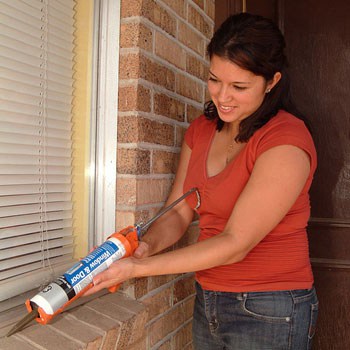
9. Drafty Windows
10. Gutters
Gutters are designed to capture water and debris runoff from your roof and divert it away from the foundation of your home. Clean gutters annually by physically removing debris from the channels and using a garden hose to rinse them thoroughly. While you are cleaning the gutters, make sure they are properly affixed to the fascia boards. Replace any sections that appear to be damaged or leaking.
A properly maintained home can extend the life of appliances and existing structures, while saving you money on utility bills through greater energy efficiency. Put an hour or two aside and see which of these home maintenance items you can tackle this weekend. Not only will your home be more comfortable, you might surprise yourself at how handy you really are!